Ruger 10/22®
Magazine Maintenance
10-22 magazine


At Gunsmoke Engineering I get a lot of email from folks that are having problems with reliable cartridge feeding, usually from aftermarket magazines. Ruger factory magazines are very good in this regard, but hard use or manufacturing defects can cause problems for these magazines as well. In the following paragraphs I'll describe some of the more common magazine related problems and show some tips for dealing with them. I'll also show how to disassemble and clean the Ruger magazine to restore it to as-new condition.

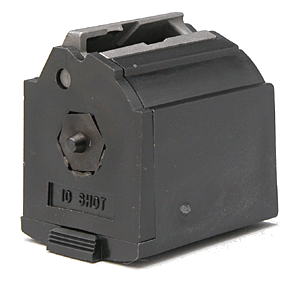
The most trouble I've had with feeding came from faulty, poorly designed, aftermarket mags. In my experience, RamLine mags are among the worst in this regard: I once had six mags of this type that wouldn't reliably feed. I went to the RamLine factory in Golden, Colorado and exchanged them for six new mags, and none of those would feed either. All six ended up in the trash. I've had good luck with Eaton Supply Inc. 25 round magazines, and also with Butler Creek "Hot Lips" magazines. If you must use an aftermarket magazine, the best you can do is the Butler Creek "Steel Lips" mag. All of the mags mentioned so far, except the Ruger and "Steel Lips", use plastic for their construction, and the feed lips that guide the cartridge into the chamber are prone to wear and will eventually start to give feed problems. This doesn't happen with the Ruger and "Steel Lips" mags, since the feed lips are made from steel which is much harder than the brass cartridges which pass through them.

Feed problems can also be caused by dirty magazines. Unfortunately, all of the aftermarket magazines I'm familiar with are permanently assembled and can not be taken apart for cleaning. About the best you can do for these is to brush off the feed lips and follower with a toothbrush and some evaporating solvent, like Birchwood Casey "Crud Cutter" or electrical contact cleaner. Best do this outside where the vapors won't give you breathing problems. Leave the magazines upside down to drain and dry after doing this, and don't put any oil into them because the oil will trap dirt in the mags.

The Ruger mags are the best, and if that's what you're using and you still have feed problems, it could be that it wasn't assembled at the factory properly. It could also be that the mag interior is dirty.

The Ruger magazine is easily serviced. Here's how:

  1. Start by removing the magazine from the rifle and removing any cartridges that it may contain.
  2. Begin disassembly by backing out the socket head cap screw at the front using a 9/64" allen wrench. When its almost out, push it back to push out the spring retaining cap on the other side of the mag. Keep your finger on this piece to prevent loss. Set the screw aside in a safe place.
  3. Remove the spring retaining cap from the spring noting how the end of the spring engages the small hole in the cap. Set the cap aside in a safe place.
  4. Remove the end of the magazine and set aside.
  5. Pull out the magazine rotor. Keep track of how it is positioned so you can put it back later.
  6. Slide the cartridge feed lips out of the magazine shell and set aside.
  7. Clean everything up in dish soap, SimpleGreen, or Hoppes, dry it off, and coat the spring with a very light coat of oil. Oil in the mag itself just gathers dust.
  8. Put the cartridge feed lips back into the top of the mag shell. The feed lips fit into the magazine shell tilted to the right, with the large boss fitting the hole in the back of the mag shell and the rounded end of the feed lip opening toward the back of the mag shell.
  9. Make sure that the end of the spring with the right angle bend engages the hole in the rotor.
  10. Put the spring and rotor into the mag shell. Notice how one of the vanes on the rotor is longer than the others? Make sure that this vane fits up into the cartridge feed lips, and that the end of the rotor engages the shoulder at the back end of the magazine shell.
  11. Put the front end shell cap in place, verifying that the rotor spring sticks out through the hole in the center and that the small boss on the cartridge feed lips engages the hole in the shell cap.
  12. Engage the protruding end of the rotor spring in the small hole in the shoulder of the spring retaining cap. Verify that the full length of the spring beyond the bend enters the hole. You may want to support the end of the spring with a small screwdriver when engaging the end in the cap hole.
  13. Thread the screw through the front of the mag shell and rotor and start the screw into the spring retaining cap.
  14. You need to tension the spring by winding the spring retaining cap in a clockwise direction. Start by taking up all the slack in the spring, verifying that the long rotor vane is visible between the cartridge feed lips. Note that the spring retaining cap has six flats on it. With all slack removed, turn the cap six flats more to tension the spring. Push the cap into the mag shell, then tighten the screw.
  15. Check the follower tension: it should be sufficient to snap smartly back when you depress the follower with a drift or screwdriver. If it's not, loosen the screw and re-check the tension. It should take four to six flats to get proper tension.

Reprinted from Gunsmoke Engineering.


Unless otherwise specified, all material herein is Copyright © 2010 J Carr Associates. All rights reserved.
No part of these pages may be copied or reproduced, in any form, without the expressed written permission of J Carr Associates.
If we have inadvertently used any artwork that is NOT in the public domain without permission, we apologize. Let us know and we'll remove it.